In this post I tackle running a website using wildcard subdomains over HTTPS and SSL all using just IISExpress.
If you have a multi-tenancy app, or rather an application that uses a wildcard subdomain to identify a user or dynamic subsite, then you may have run into trouble trying to test the subdomain functionality locally. The problem is compounded when you also want to ensure your site is served using HTTPS and SSL.
We’ll start basic and then move on to the more complex scenarios.
Important. Open Visual Studio in Adminstrator Mode.
Single Custom Domain
Firstly, lets take a look at setting up a local domain. I’ve spun up a brand new project and hit F5 straight away.

Figure: I’m running on port 34113, but you will be assigned a different random number
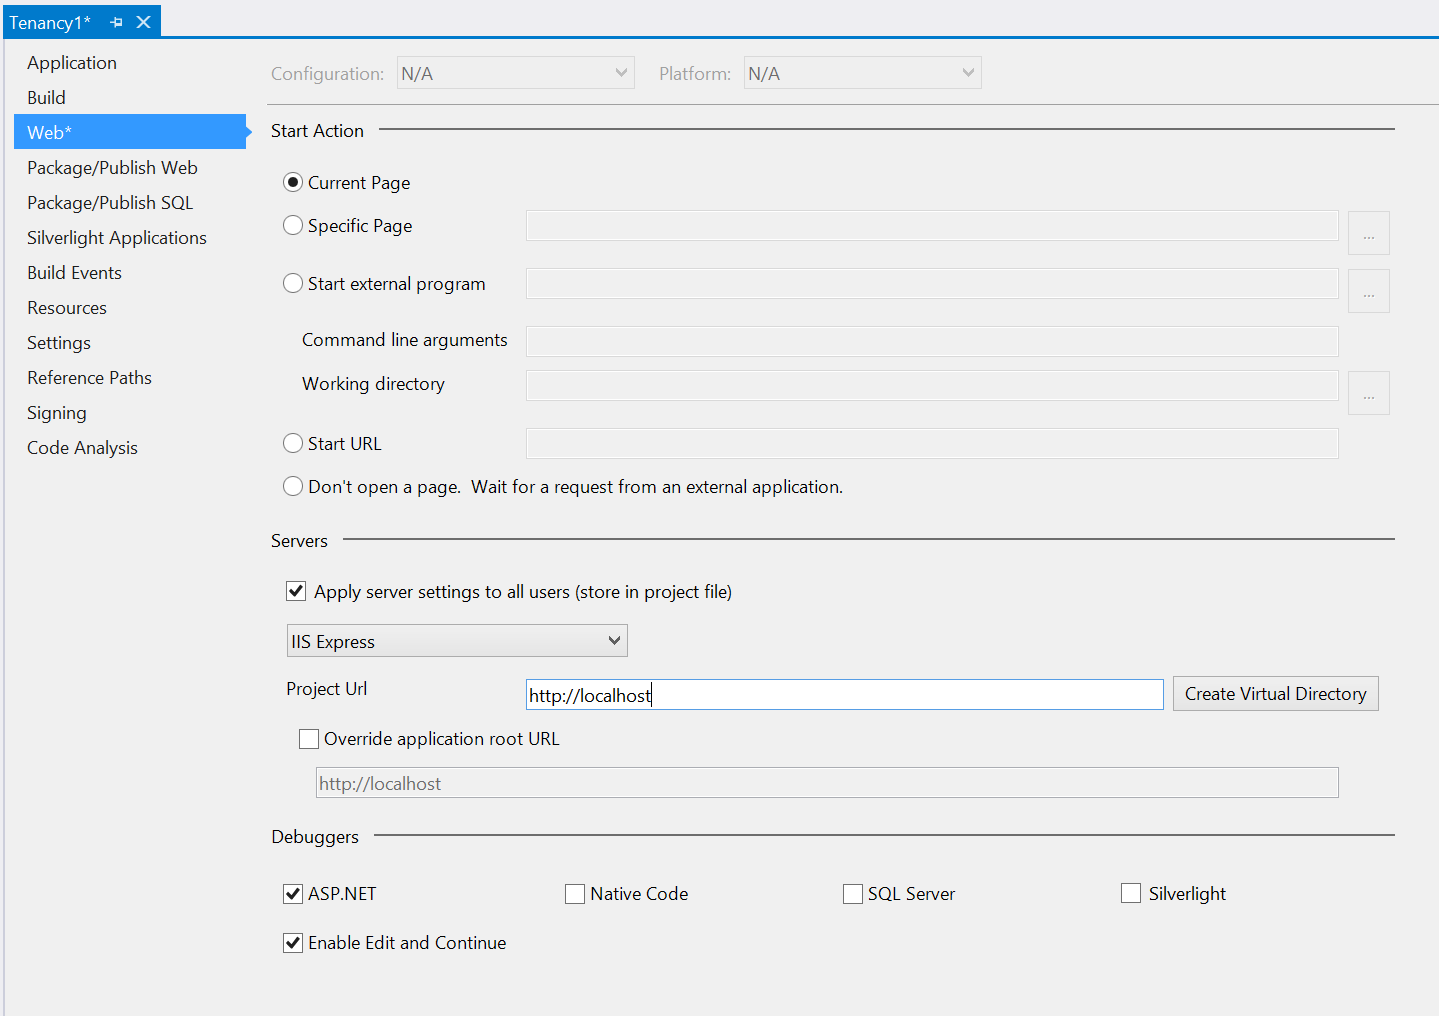
If we want a custom domain we just change a couple of things. Firstly right click your project, select Properties and click on the Web tab.
Update the Project URL to http://localhost, pictured below. This step binds our project to port 80.

Figure: Pretty easy so far
When you save it will ask you to create a virtual directory, click yes :)
Important. If you get “Unable to create the virtual directory. You must use specify ‘localhost’ for the server name.” Then you’re not running in Administrator Mode.
Let’s try running the app now!

Figure: Woo! We’re running on localhost port 80.
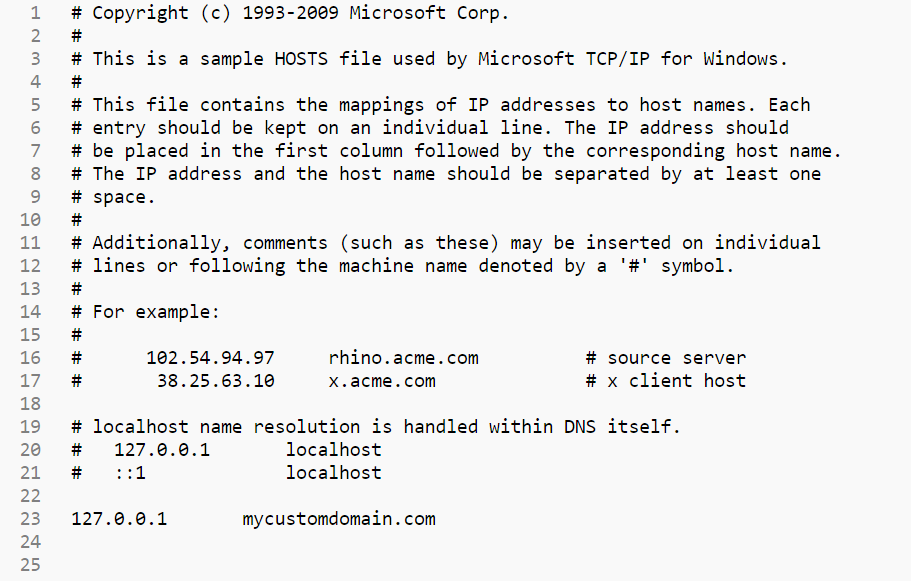
Next add your custom domain name to the hosts file, as always located at C:\Windows\System32\drivers\etc\hosts. Be sure to edit the file as an admin.
Here I’m adding 127.0.0.1 mycustomdomain.com

Figure: Adding the line to my hosts file
Lastly, update your iisexpress config with the new bindings. You can usually find your IISExpress Application config here: C:\Users\YOUR_USERNAME\Documents\IISExpress\config\applicationhost.config
Update 2015-04-30 As of Visual Studio 2015 your applicationhost.config can now be found inside your solution folder: ~\.vs\config\applicationhost.config
Important: Make a backup of your config file. You can really screw things here.
Open the file and look for the <sites> node. You should be able to see your application in the list of sites.
We’re going to update the http binding by changing localhost to our custom domain name.

Figure: Update localhost to mycustomdomain.com
Once you saved, check that IIS Express isn’t running. If it is, stop it.
Go back to your project and hit Ctrl+F5 to start IIS Express again. It will try to launch “localhost” without success, so just change the URL to mycustomdomain.com and you should be up and running!

Wildcard Subdomains
Awesome, now let’s get some wildcard subdomains working. Luckily it’s dead simple!
Open up your applicationhost.config file again (C:\Users\YOUR_USERNAME\Documents\IISExpress\config\applicationhost.config) and find your website.
This time instead of adding a custom domain, we’ll remove the hostname altogether.

Figure: This binds to any hostname on port 80
Don’t forget to restart IIS Express. This is neccessary for any changes you make to the applicationhost.config
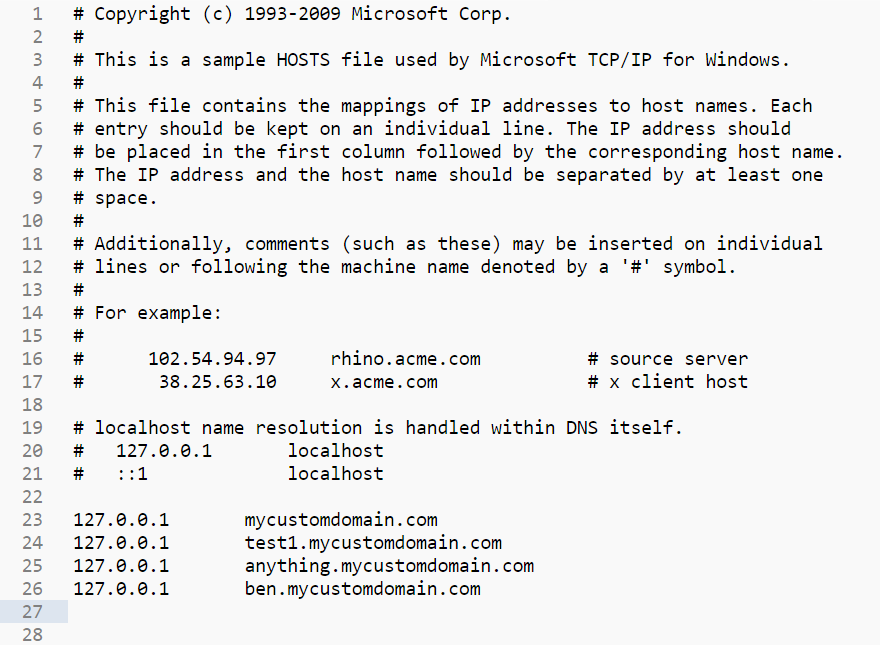
The only pain is that you need to add each subdomain to the hosts file:

Figure: I’ve added a few test subdomains

Figure: Woo! It works!
Now using HTTPS and SSL
By this point you’d think you have everything you need to get https working, however there is a key step we haven’t taken yet that is in no way obvious.
We need to set up the certificate bindings in http.sys. If you have no idea what that is, don’t worry I hadn’t heard of it either.
For some background, IIS Express has already bound ports 44300 to 44399 to a local certificate for local https development. What we’re doing is taking that same certificate and binding it to 443 as well.
Let’s start by firing up a command prompt and whacking in this command: netsh http show sslcert > output.txt
This will create a new file called output.txt containing all of the currently bound ports and their cert hashs etc… Take a look at mine:
 Figure: Pay special attention to the cert hash and the app id.
Next we’ll add our own binding for port 443. run this command:
netsh http add sslcert ipport=0.0.0.0:443 certhash=a3d1639550f4549a8cfd2d4ec42d5ed58f521ed6 appid={214124cd-d05b-4309-9af9-9caa44b2b74a}
I’ve used the values from my text file, but make sure you replace the certhash and appid with your own.
Now we need to restart the http service. Do so by running these commands:
net stop http

net start http
Now that we have our http bindings, we just need to update our applicationhost.config again one last time.
Change port 44300 to 443 and remove the hostname like before.

Figure: This looks familiar.
Restart IIS Express again :)

Figure: Hooray! We’ve finally done it.
Phew! That was a pretty long list of steps, but at least we have a better understanding of what happens under the IIS Express covers. Keep an eye out though, the applicationhost.config is updated all the time by Visual Studio. You may need to re-apply some of the changes we made from time to time. Especially if you are juggling a few projects at once.

