If you’re like me and always forget how to create a self-signed certificate, here’s a handy guide to creating a new one with appropriate security for 2017.
I’m also throwing in a quick guide for how to use this self-signed cert to sign tokens with Identity Server, as well as how to upload and use this cert from within Azure App Service.
Creating the Self-Signed Cert
First of all, we need to download and install OpenSSL. It’s an awesome tool that can do nearly anything to do with certificates. Unfortunately, if you visit the website, you’ll find no easy way of installing the application.
Instead, a company called Shining Light Productions does the difficult work of compiling the application for windows, and makes a nice installer available.
1. Download the handy installer:
https://slproweb.com/products/Win32OpenSSL.html
2. Add the binaries to the system path
The default install location is C:\OpenSSL-Win32. Wherever you installed it, you’ll need to add the bin folder to the system path.
In my case, I added the following to system path: C:\OpenSSL-Win32\bin.
3. Create the certificate and private key
Once OpenSSL is installed, we can use it to create the certificate. Run the following command from a powershell (or any other) terminal.
openssl req -x509 -newkey rsa:4096 -sha256 -nodes -keyout example.key -out example.crt -subj "/CN=example.com" -days 3650
You can edit the filenames/subject if you like, and also feel free to change the expiry days (it’s currently set to 10 years). Unless you know what you’re doing, leave the other settings alone. They are appropriately secure at the time of writing (June 2017). If you’d like to know more about OpenSSL and generating certificates, you can read some interesting information on this Stack Overflow page: https://stackoverflow.com/questions/10175812/how-to-create-a-self-signed-certificate-with-openssl
4. Convert the certificate and key into a self-contained .pfx file
Azure (and many windows applications) prefer the certificate in the self-contained PFX format. Luckily, it’s pretty easy to convert our new cert to this format using OpenSSL. Run the following command:
openssl pkcs12 -export -out example.pfx -inkey example.key -in example.crt -certfile example.crt
If you changed the filenames in the last step, be sure to update them here too. Also notice how we use the cert as it’s own Certificate Authority, which is why it’s referenced twice.
Keep in mind, you’ll be asked to enter an export password. This will be needed whenever you want to use the pfx file, so keep it handy.
Using the certificate with Identity Server 4
The best way to use your self-signed cert with Identity Server 4 is to load it from the registry. The following section can also apply to many other use cases, so it’s worth looking at.
Load the certificate from the registry
In this case I’m using ASP.NET Core, and adding this code to my ConfigureServices method, but you can run this code from anywhere if you just want to load the certificate.
X509Certificate2 cert = null;
using (X509Store certStore = new X509Store(StoreName.My, StoreLocation.CurrentUser))
{
    certStore.Open(OpenFlags.ReadOnly);
    X509Certificate2Collection certCollection = certStore.Certificates.Find(
        X509FindType.FindByThumbprint,
        // Replace below with your cert's thumbprint
        "CB781679561914B7539BE120EE9C4F6780579A86",
        false);
    // Get the first cert with the thumbprint
    if (certCollection.Count > 0)
    {
        cert = certCollection[0];
        Log.Logger.Information($"Successfully loaded cert from registry: {cert.Thumbprint}");
    }
}

// Fallback to local file for development
if (cert == null)
{
    cert = new X509Certificate2(Path.Combine(_env.ContentRootPath, "example.pfx"), "exportpassword");
    Log.Logger.Information($"Falling back to cert from file. Successfully loaded: {cert.Thumbprint}");
}
There are a couple of important things to notice here.
Firstly, we use the My/Personal store of the CurrentUser registry. This is where Azure will load the certificate when we upload it later.
Secondly, you don’t have to use the registry if you don’t want to. In this case, if the developer hasn’t loaded the cert into their registry, the code will fallback to opening the certificate file directly. In many cases, this might be a better option. In my case, the _env property is a IHostingEnvironment found in the startup.cs of an ASP.NET Core application. You can just replace this with the filepath.
Load the cert into Identity Server
Finally, we tell identity server to use our self-signed cert to sign all of our tokens. Update your AddIdentityServer() method with the following line:
services.AddIdentityServer()
    .AddSigningCredential(cert);
Easy peasy.
Using your certificate with Azure App Services
Once you’re ready to deploy your application to Azure, you’ll need to follow these steps to use your certificate in code.
1. Upload the certificate
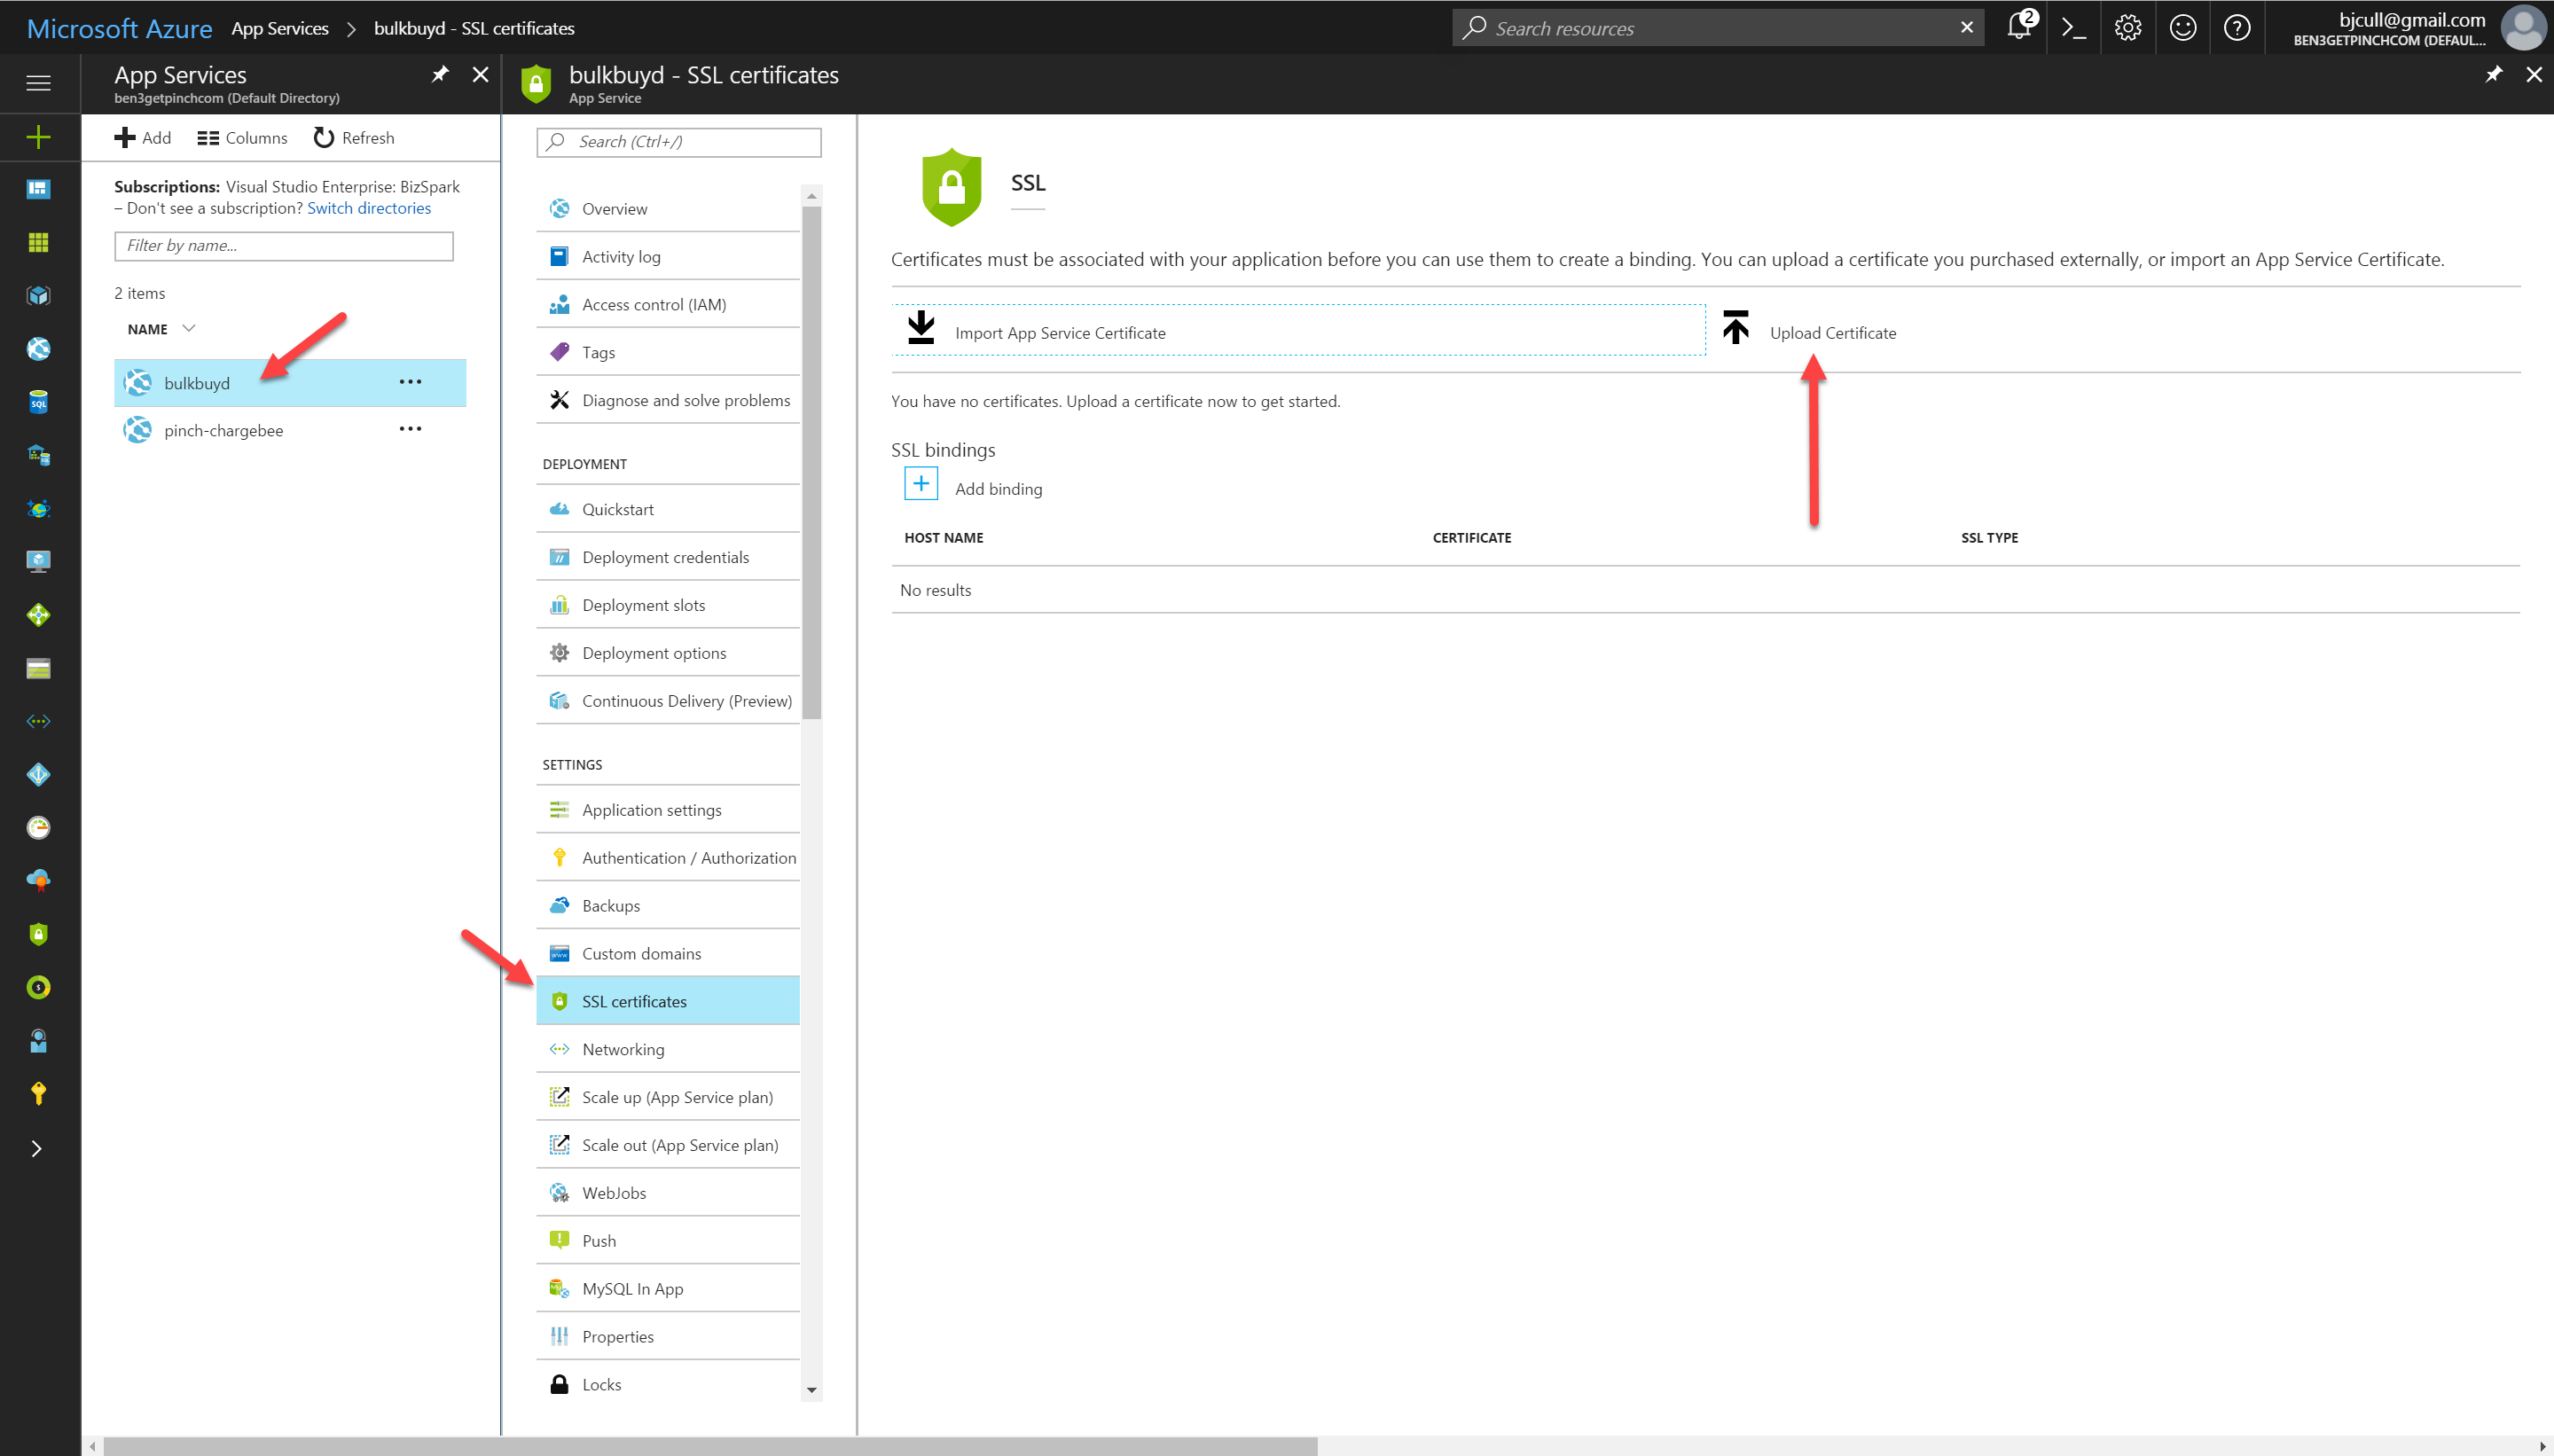
Load up the Azure portal and navigate to the Azure App Service you’d like to use.
Click the SSL Certificates menu item and the click the upload certificate link.
Find your .pfx file, enter in the export password you created earlier and hit upload.

2. Add the WEBSITE_LOAD_CERTIFICATES application setting
This is really important. Azure won’t make the certificate available to the application without adding this special application setting.
Click the Application Settings menu item and add the following to the App Settings section:
| Name | Value |
|---|---|
| WEBSITE_LOAD_CERTIFICATES | * |
It should look like this when you’re done:

And that’s it. You’ve now generated your own certificate, loaded it into Azure and passed it to Identity Server to use to sign your access tokens. Cool beans.

